Custom designed paper place-mats, stained to give it a vintage look and feel.
Use as table place-mats or serving tray mats
Use it and dispose it
or
Laminate and reuse
or
Frame it and hang it on a wall
what ever or where ever your creativity takes you too
What was used?
- New and salvaged paper sheets (a3)
- Vintage and other graphics and typography
- Printer (laser)
- Own recipe stain (combination of teas, coffee granules, water)
- Sponges
Was it fun? Oh boy, I had so much fun doing this project.
What took up a lot of time? The graphic design work and the staining took the longest.
Where did I get graphics from? I sourced vintage graphics from the web, and also created my own designs. (I will be posting a few of my own designs for download on this blog in the near future)
A combination of all the graphic elements resulted in the final selection of themed sets and filler sheets.
 |
The end product selection has various styles and designs.
After printing the sets I set about staining each individual sheet.
I was very eager (in hindsight a bit too eager) and printed over 500 pages
- hmm that in itself would not have been so bad if only I did not decide all the pages must be stained at the same time.
|
 |
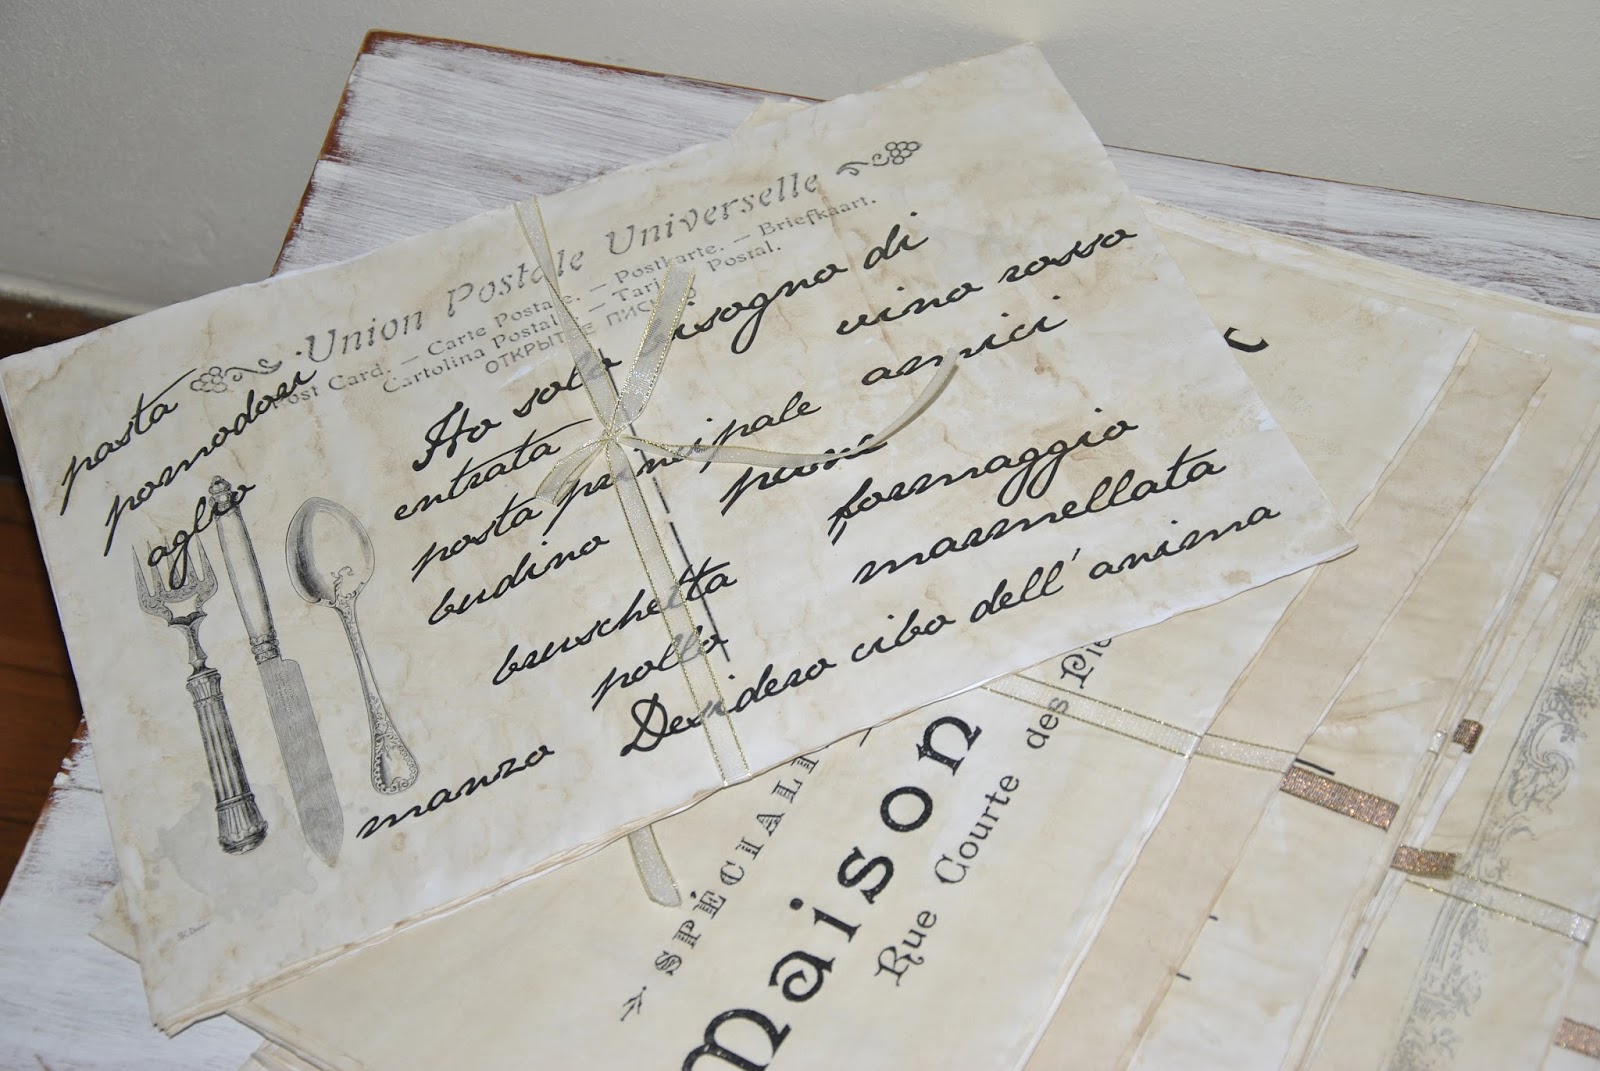
Vintage graphics, like the one used in this set, sourced from www.graphicsfairy.com
|
First I tried a"dip it in" stain process - big failure! One after the other the sheets ripped, I ended up with a plastic container full of stain and pulp, not quite the result I wanted (lol), what was I thinking?
Okay, so then do each sheet by hand painting with stain,
I have done lots of by hand staining before and it is not so bad. Only difference, I did not do 100's of sheets in one go before.
This process took a lot longer than what I anticipated, and it is delicate work. The wet sheets rip easy and must be laid flat to dry and preferably not handled at all or very gently until dry.
 |
| One of the themed sets: "Serve it up" featuring plates and cutlery |
I soon realised that my working space is to small.
Working with literally hundreds of wet stained paper sheets requires either :
1. patience - which I have a serious lack of when I am eager to work on a project, or
2. a huge a flat area in a space where the wind cannot blow away, crumble or fold the sheets.
Since I had neither of these 2, I started dying and drying in batches. Staining on my kitchen counter, tiled floor, workshop counter and any other flat surface that could get wet, and that I could remove the stain from again.
To get the drying process done quicker, I used my hairdryer to speed up the dry-time.
(Art has helped me to discover a lot of useful and multi purpose functions in many of my household or beauty appliances)

 |
| Another themed sets: "Vintage rooster" and cutlery |
Once dry, the sheets were sorted and packed.
and ready for sale.

 |
| I love the different shades and depths that comes from working with hand applied stain |


sites to visit :
www.graphicsfairy.com